Set Up Your Program
Complete the five setup steps (Business, Commission, Tracking, Payments, Go live) and publish your program on the marketplace.
Last updated Oct 15, 2026
Setup takes your program from created to live in five steps: Business, Commission, Tracking, Payments and Go live. It opens at the Business step as soon as you create your program, at affitor.com/brand/setup/business.
The flow at a glance
The top of each step shows Step N of 5 and Save and exit. Continue saves the step and opens the next one. Save and exit saves Business or Commission first, then opens that page in Settings; the other steps have nothing to save and open their Settings page directly. On a wide screen the step list sits on the left, where a done step shows a check (Business also shows your website, Commission your rate), and What partners see previews your program card on the right.
The same five pages are also Settings → Program settings, so anything you set here stays editable there. Until the program is live, Program settings shows how many of the five steps are done. After launch the pages have no Back or Continue: Business and Commission have Save, Payments saves when you pick a method, and Go live is named Status.
Step 1: Describe your business
The Business step (Your business) sets what partners see first.
| Field | Required | Notes |
|---|---|---|
| Business name | Yes | 1 to 80 characters |
| Website | Yes | Your product or site URL. example.com is saved as https://example.com |
| Program URL | Yes | Your public program page, affitor.com/marketplace/<handle>. Lowercase letters, numbers and dashes, up to 48 characters. You can change it later |
| Logo | No | PNG, JPG or SVG, square, under 5 MB |
| Tagline | No | In Settings only (Program settings → Business): one line on your marketplace card, up to 160 characters |
Continue saves only the fields you changed and moves on once every save succeeds; an error shows under its field. The step is done once the program has a business name and a website.
Step 2: Set your commission
The Commission step sets what partners earn and how they join.
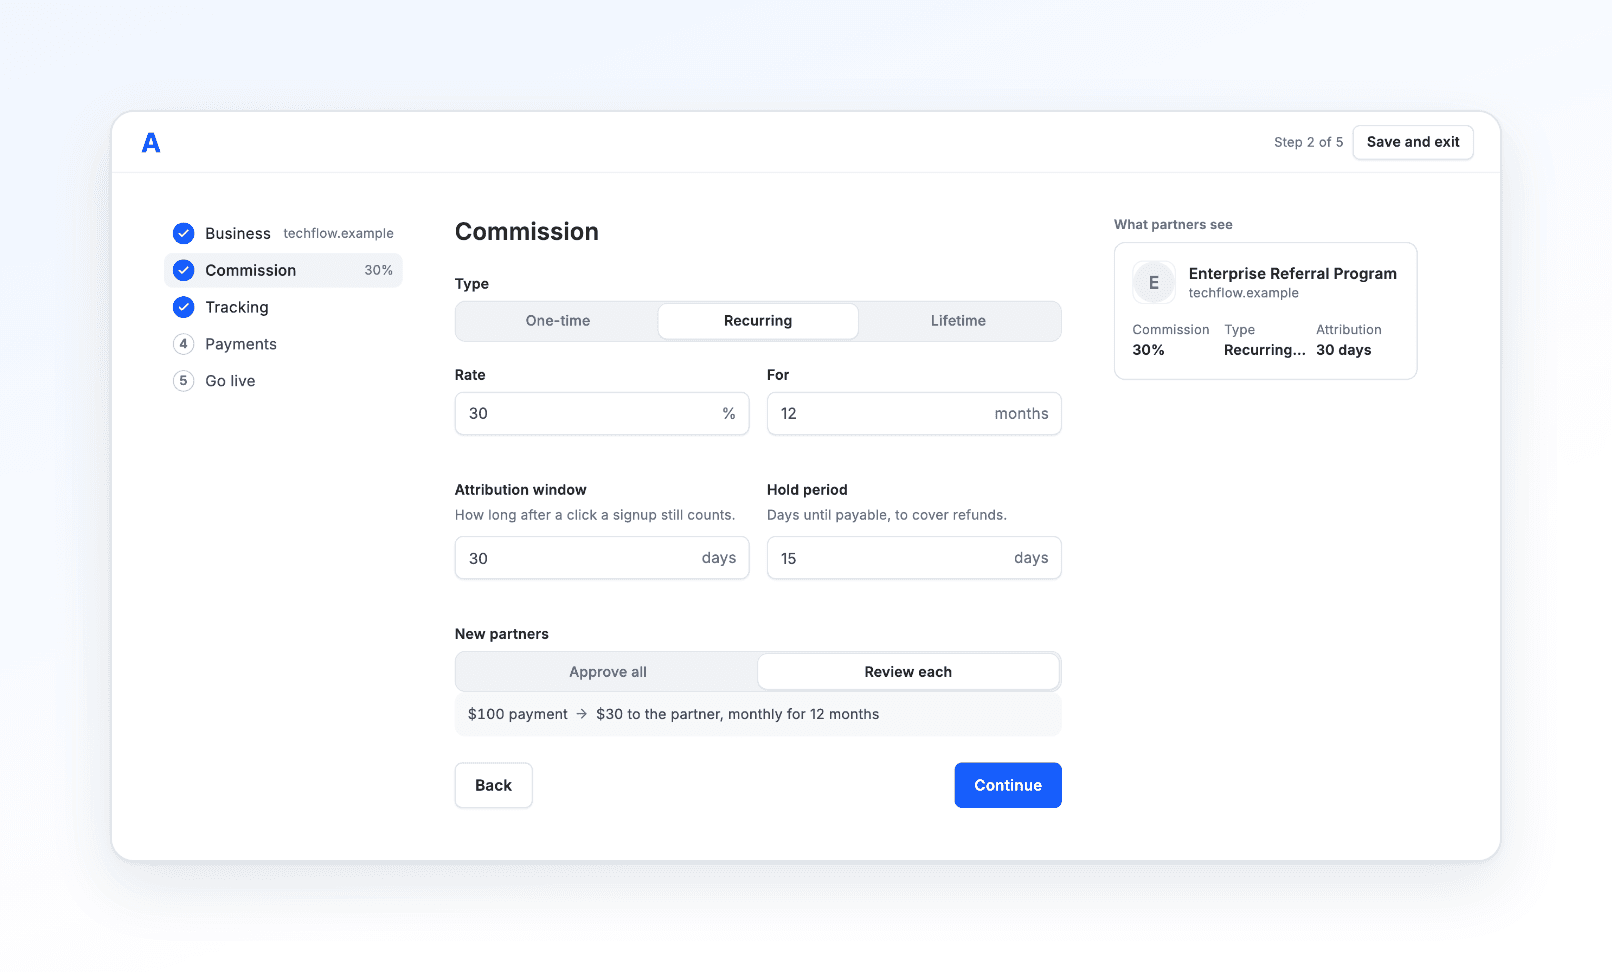
| Field | Required | Notes |
|---|---|---|
| Type | Yes | One-time pays on the first payment, Recurring monthly for the months in For, Lifetime on every payment |
| Rate | Yes | Percent of the payment, 0 to 100 with up to 2 decimals |
| For | Yes, for Recurring | How many months the partner keeps earning: a whole number from 1 to 36. Shown only for Recurring |
| Attribution window | Yes | How long after a click a signup still counts: 1 to 365 days |
| Hold period | Yes | Days until a commission is payable, to cover refunds: 0 to 31 |
| New partners | Yes | Approve all approves every application; Review each lets you review each one |
Once the rate is valid, a line shows what a $100 payment gives the partner, for example "$20 to the partner, monthly for 12 months". If your saved terms are ones this form cannot show exactly (for example a fixed amount), the step shows them as Current terms and keeps them unless you select Set new terms.
The step is done once a sale commission is saved and a New partners choice is set. To pay some partners a different rate, use groups.
Step 3: Install tracking
The Tracking step (Install tracking) puts the click tracker on your site. Pick an Install method:
- Your agent: select Connect your AI to connect Claude, Cursor or another AI app and let it add the tracker. Shown only when AI agents are available for your program.
- Script tag: paste the tag in
<head>on every page of your site. - npm: install the SDK and wrap your app in the provider.
The snippets on the page already carry your Program ID:
<!-- Include Affitor Tracking Script -->
<script
  src="https://api.affitor.com/js/affitor-tracker.js"
  data-affitor-program-id="YOUR_PROGRAM_ID"
  data-affitor-debug="false">
</script>npm install @affitor/sdkOn Next.js App Router, put the provider in a client component and render it once in your layout:
// app/providers.tsx (a client component)
'use client';
import { AffitorProvider } from '@affitor/sdk/react';

export function Providers({ children }: { children: React.ReactNode }) {
  return <AffitorProvider programId="YOUR_PROGRAM_ID">{children}</AffitorProvider>;
}// app/layout.tsx (Next.js App Router): render it once around your app
import { Providers } from './providers';
export default function RootLayout({ children }: { children: React.ReactNode }) {
return (
<html lang="en">
<body>
<Providers>{children}</Providers>
</body>
</html>
);
}The provider runs in the browser, so it lives in a client component: in the App Router, layout.tsx is a Server Component. With the Pages Router, wrap your app in AffitorProvider in pages/_app.tsx.
Below the snippets, Tracker on your site shows Waiting for the first visit, Tracker not found on your site yet, or First click and how long ago it arrived. Check now asks Affitor to look for the tracker on your website again. Nothing is saved on this step: Continue turns on after the first click, and Skip for now moves on to Payments.
The step is done once Affitor finds the tracker on your website or receives real tracking events. Signup tracking is a separate install: see signup tracking, and click tracking for the full click guide.
Step 4: Connect payments
The Payments step (Connect payments) sets how Affitor records your sales. Choosing an option saves it right away. Only the program owner can choose the method or connect Stripe; other members see its state and "Only the program owner can connect payments."
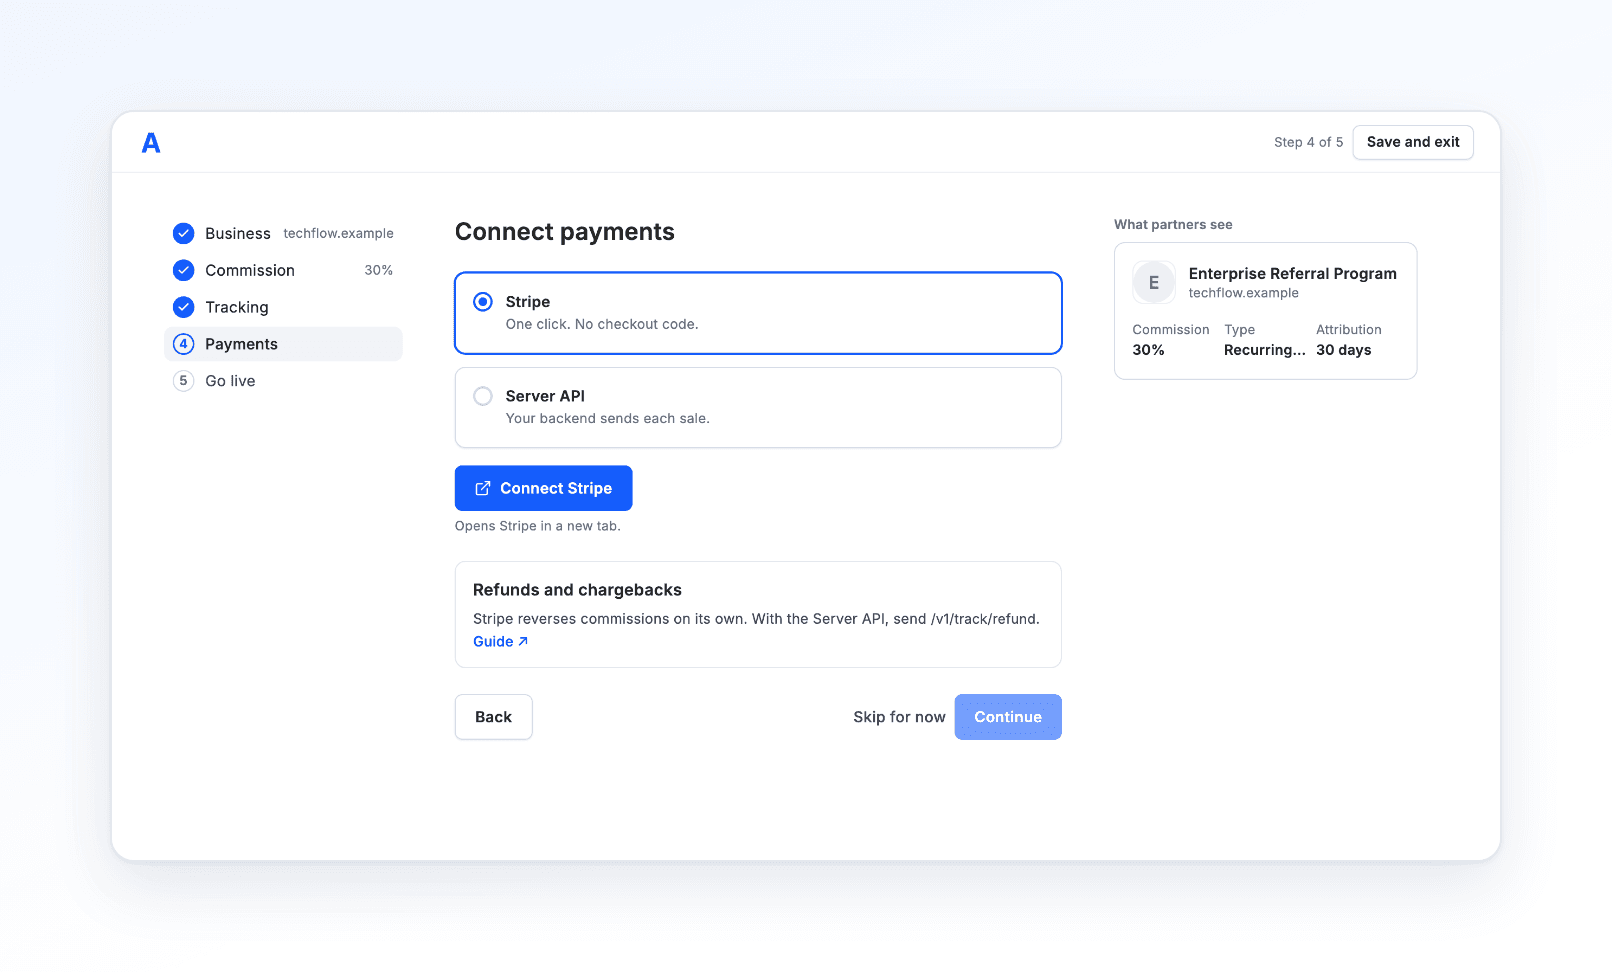
| Option | On the page | What to do |
|---|---|---|
| Stripe | One click. No checkout code. | Select Connect Stripe. Stripe opens in a new tab; finish there and this page updates when you come back. If you started and did not finish, the button reads Finish in Stripe. Once connected, the page shows Connected |
| Server API | Your backend sends each sale. | Run the test sale below once from your server. The page shows Waiting for a test sale from your server until it arrives, then Received. Check again reads the status now |
The Server API test sale uses your program API key (where to find it). With "livemode": false it is a test sale and creates no commission:
curl -X POST https://api.affitor.com/api/v1/track/sale \
  -H "Authorization: Bearer YOUR_PROGRAM_API_KEY" \
  -H "Content-Type: application/json" \
  -d '{
    "click_id": "clk_abc123",
    "customer_key": "user_123",
    "amount_cents": 4900,
    "currency": "usd",
    "transaction_id": "txn_test_001",
    "livemode": false
  }'
Once payments are connected, Check Affitor's tracking offers Run check: Affitor sends a test click, signup and sale through your program and shows each as Matched, Not matched, Wrong partner or Waiting. It is a pipeline check and does not count toward Go live.
Refunds and chargebacks: with Stripe, Affitor reads refunds and disputes from your connected account. With the Server API, report each refund with Track a refund.
The step is done when Stripe is connected, or, with the Server API, when Affitor has received a sale from your server. Skip for now moves on to Go live, which shows what is still missing.
Step 5: Go live
Go live publishes your program on the marketplace. The page lists four rows:
| Row | Needed to go live | Done when |
|---|---|---|
| Business | Yes | the program has a business name and a website (the logo is optional) |
| Commission | Yes | a sale commission is saved |
| Click tracking | No | Affitor finds the tracker on your website or receives real events; until then the row reads "Optional · no visit seen yet" |
| Payments | Yes | Affitor can record your sales (see below) |
A row that is not done has Fix (Set up for click tracking), which opens its step. The page also shows the address your program page opens at. Go live turns on once the three required rows are done, and Affitor checks them again when you select it.
Payments counts as connected in one of two ways, matching the method you chose on the Payments step:
- Stripe: your Stripe account is connected to the program.
- Server API: your server has sent at least one sale for this program to
POST /api/v1/track/sale. A test sale counts (send it with"livemode": false), so you can go live before your first real customer. Run check does not count; the sale has to come from your server.
Click and signup tracking are not required to go live. Install them before you invite partners so their traffic is attributed.
If the program is paused for an overdue invoice, Go live stays blocked: selecting Go live shows the overdue notice with Open billing. Pay the invoice first.
Once live, the page says your program is live and shows its link with Copy link, plus Open dashboard and Invite partners.
Before you invite partners
Verify it worked
Open Settings → Program settings and check that each page kept what you saved:
- Business shows your business name, website, program URL and logo
- Commission shows your type, rate and, for Recurring, the months, plus Approve all or Review each, whichever you picked
- Payments shows Stripe Connected, or Received for the Server API
- Until the program is live, Quick start in the top bar shows how many setup steps are left; once it is live, Go live in Program settings reads Status
- A page shows old values? Business and Commission save only when you select Continue, Save or Save and exit: reopen the page, re-enter, and save again
- Go live stays off? Each row that is not done has Fix, which opens the step it needs
- Set up with the CLI instead? Run npx affitor status from your project root. It prints your program card (name, domain, program ID). For payments, trust the Payments page: it is what Go live counts
- Click tracking not done yet? It turns done once Affitor finds the tracker on your website or receives real events, which the tracking quickstart covers next